Project Space Balloon – Background
The below has been taken from the VK3BQ blog/website, and is aimed to provide some insight into the Project Space Balloon Team and what they do before the Clubs meeting and presentation Friday 7th March 2014.
**************
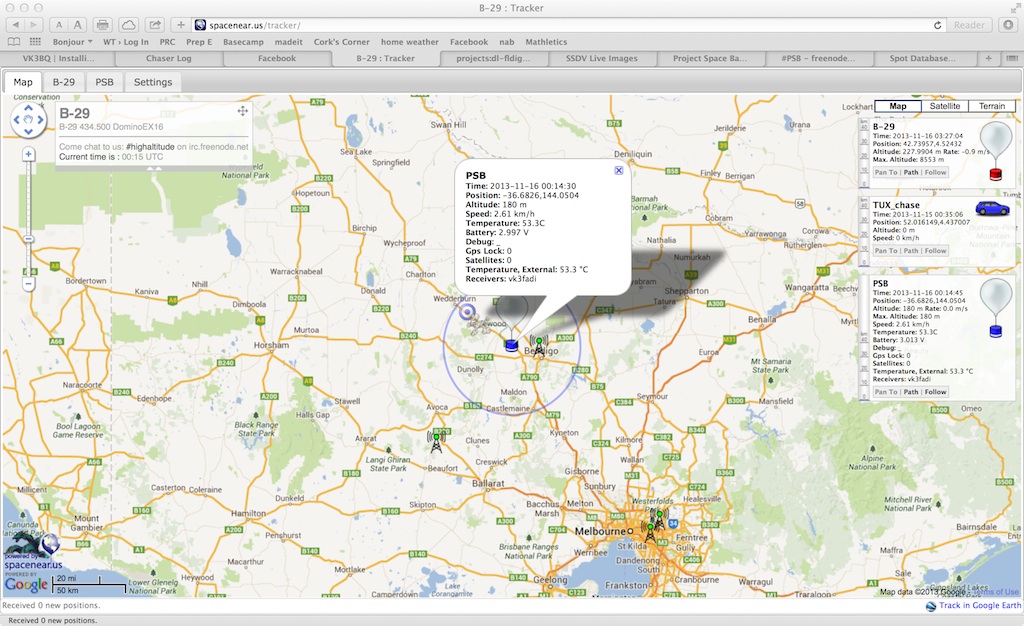
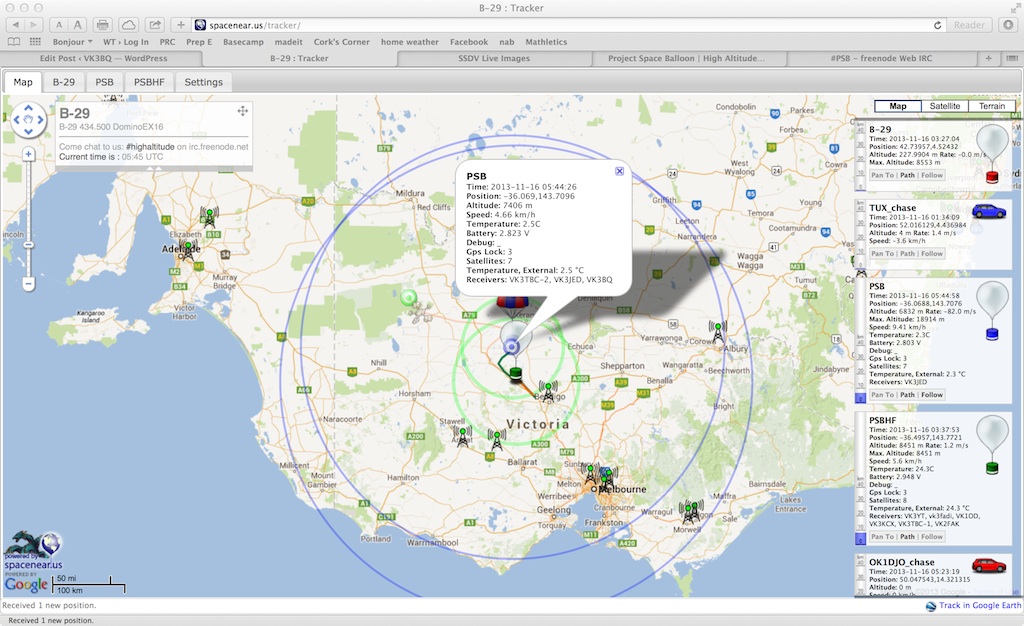
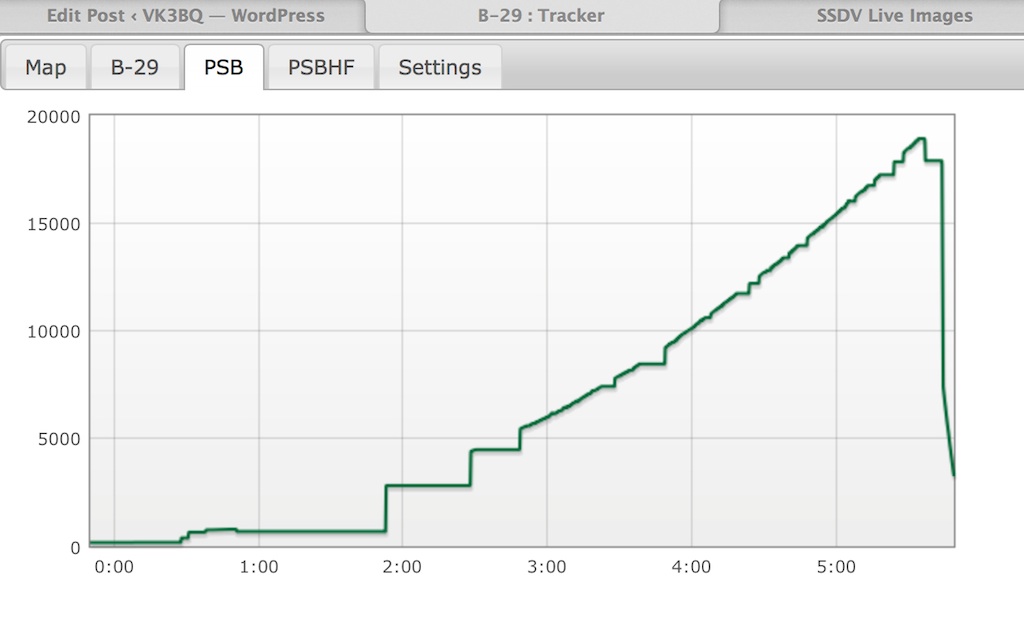
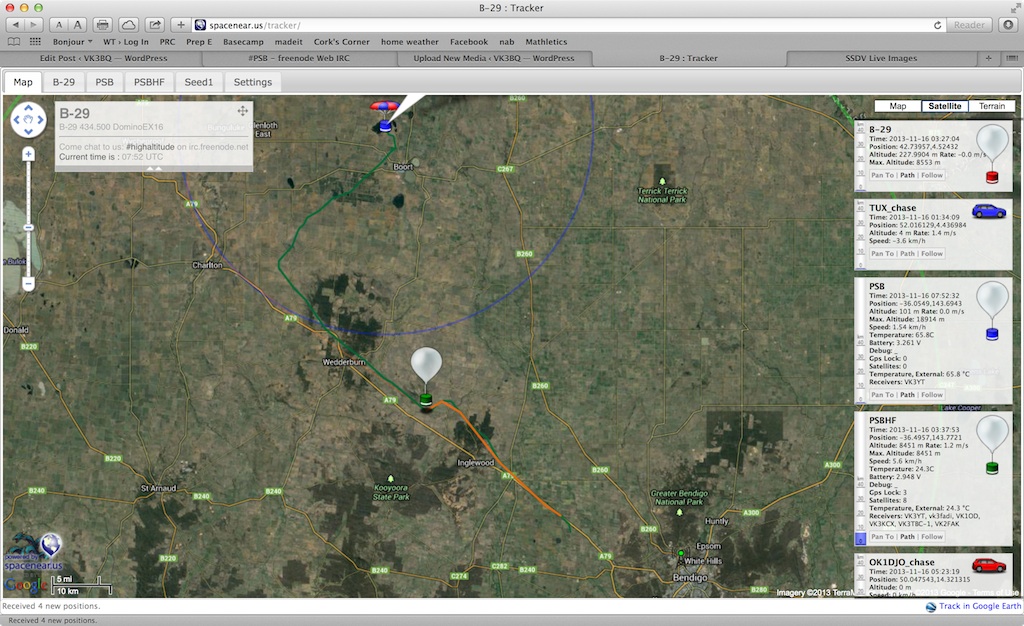
PSB5 has been flown. The device was launched at around 11:30am north west of Bendigo and I was able to track the device from around 12:30 when it was heigh enough to be seen from home. The path was very different from that expected when they ran the prediction 2 weeks ago, the device headed upwards and traveled north west from Bendigo slowly, very little wind. The device reached around 18km before popping just before 5pm, landing somewhere near the town of Boort. Last message received from bendigo was at 4:48pm. around 100km of ground distance covered in ~5 ½ hrs.
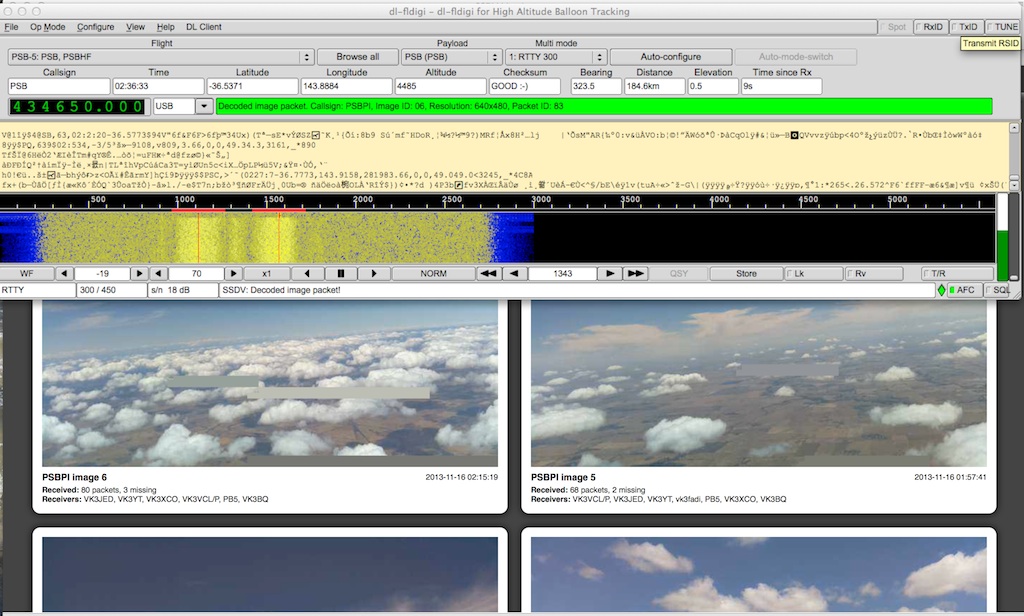
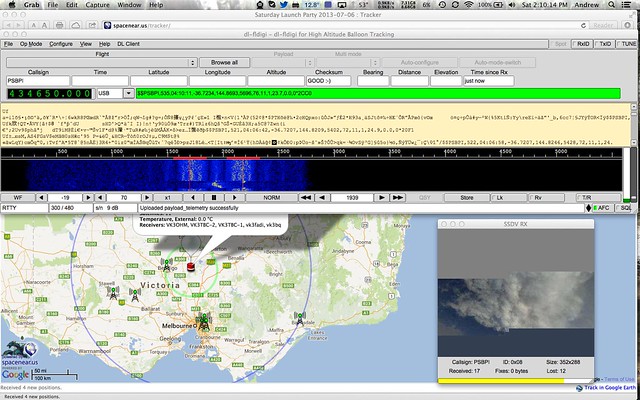
My UHF rig did most of the work. running the fldigi software decoding the RTTY and SSDV image data.
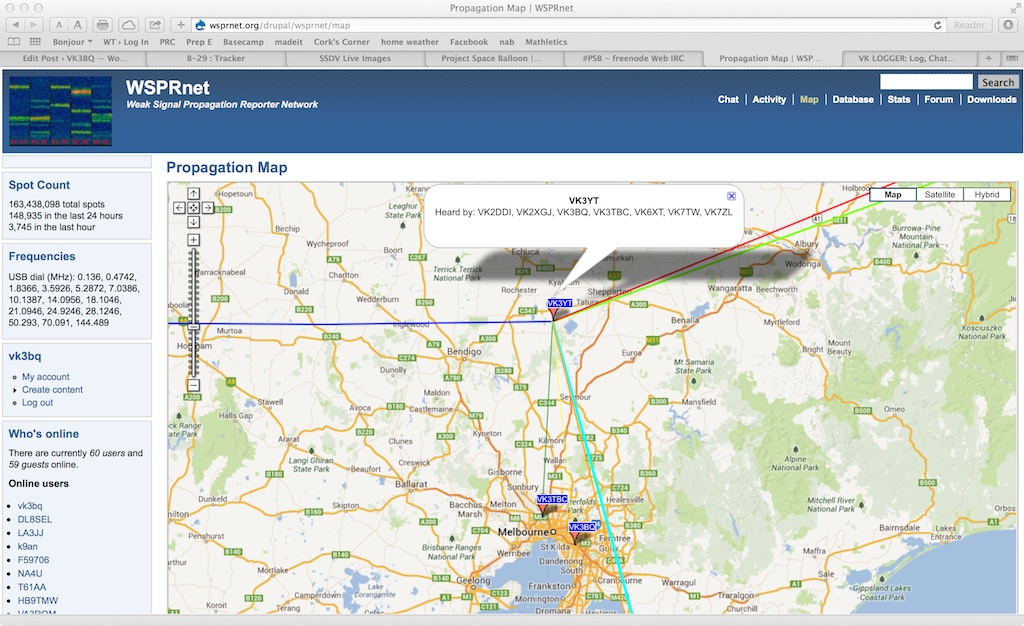
I was also able to connect my ft817 to my HF antenna and Signalink and a second computer and decode WSPR on 10MHz. I only managed one decode, around 3:40pm local time. but I got a HF HAB decode :D. it would have been good to do more HF work, but the various modes and jumping frequencies wasn’t super easy, thus I just focused on what I knew worked, (wspr).
Thanks PSB guys for running this launch. was fun to follow.
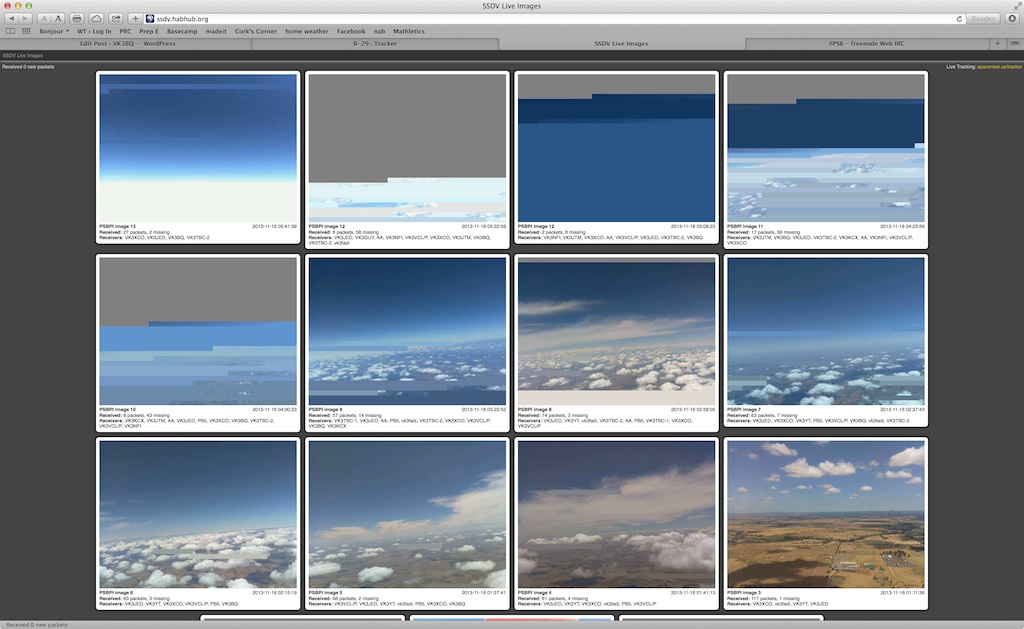
Some screen shots and a video of the UHF decode.
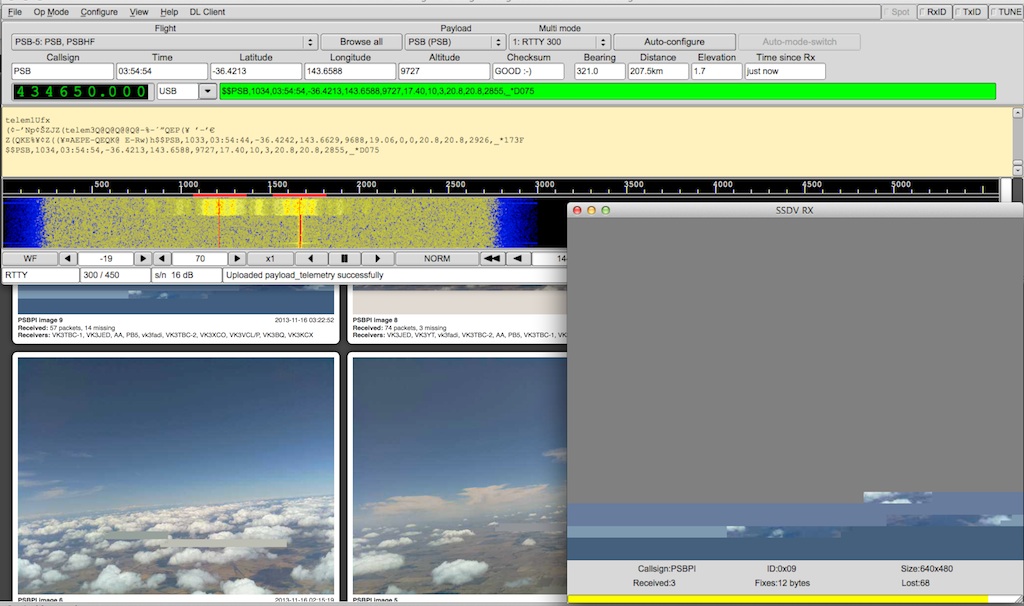
Decoding and tracking on UHF

WSPR decode on 10Mhz USB

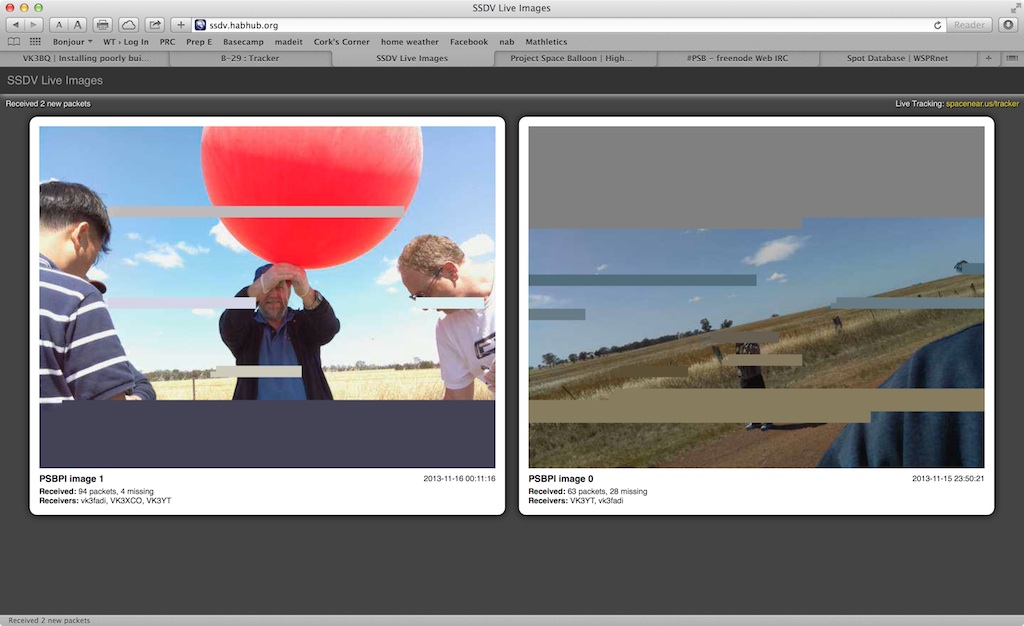
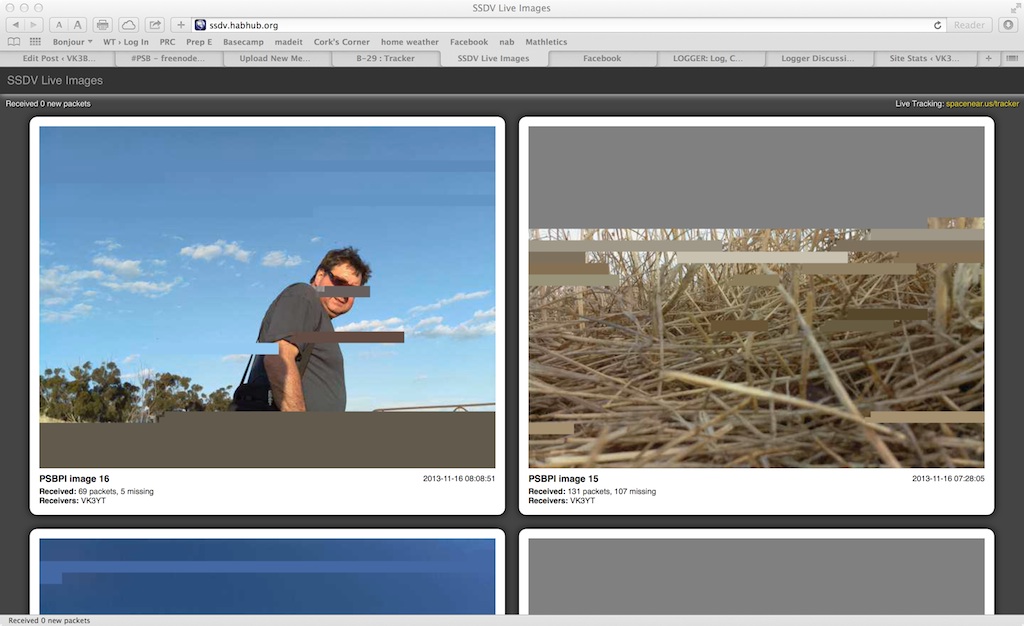
Height Profile and some photos the payload took.
Landing spot in a field, and the team recovered the payload!.
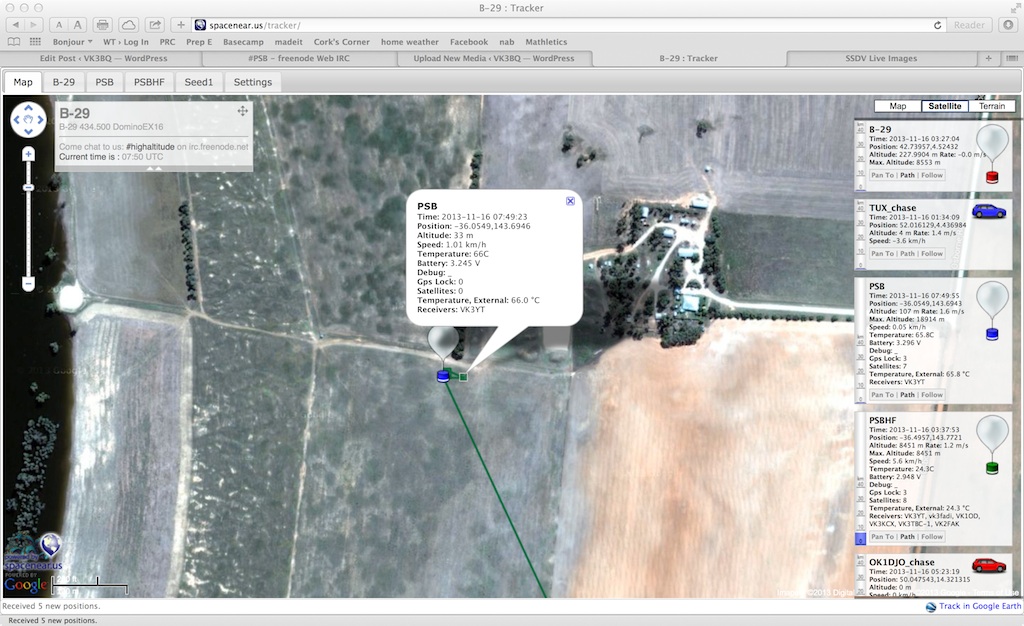
The Path the Balloon took
**************
In late June, an email arrived on the VK APRS list promoting another High Altitude Ballon Launch, this time from Bendigo (central Victoria). run by the http://projectspaceballoon.net/ guys!.
The Launch was slated for midday Saturday July 6th (what a nifty birthday pressie for me!), a small balloon carrying a Raspberry PI payload with Camera and LIPD 434mhz 25mw transmitter. the launch was a little late, the guys who run this appear to be learning and understanding the best way to get these to happen along the way. ++ The weather hadnt been the best very strong winds and some rain through Victoria.
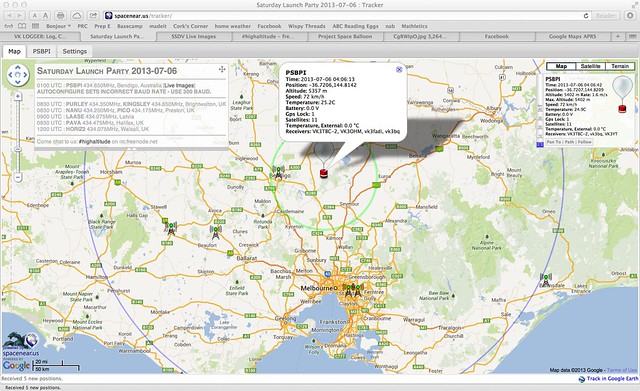
This was the first lauch I had watched/followed/tracked that run a REAL time camera sending (slowly) images to the ground and to the server to create the images, crowd sourced with checksums, the images come down in small packets using RTTY at 300bps.
The details were:
- – Frequency 434.650Mhz (+-10Khz), USB
- – RTTY with 460Hz shift, 300 baud, 8 bit ASCII, no parity, one stop bit.
- – Hardware is a Rev A Raspberry Pi, with a 25mW UHF transmitter module.
- – Antenna is a quarter-wave with radials.
- – Expected “cruising” altitude is 20km.
this SSDV software is a special version of fldigi, and optimised for high altitude balloons. http://projectspaceballoon.net/ssd/
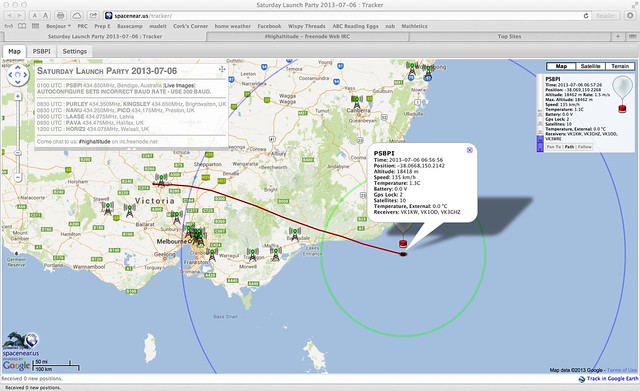
From home in Mt Waverley, on my small vertical in the backyard, I was able to track the balloon from around 45mins after launch (some issues with my end config, the flight team had changed the !) through to it crossing the coast near Orbost, others were able to track it as it headed to New Zealand.
The last transmission was received at 07:48 UTC, where it was at 17859m and 320km East of Lake Entrance, heading towards NZ at 141km/h.
We tried to raise our friends from NZ for further tracking but the timing wasn’t good, most people were sleeping! By now the batteries would have run out, or the balloon have bursted.
- Max alt: 18556m
- Distance travelled before losing contact: 690km, in 5h46m
- Max ground speed >250km/h
- Maximum number of tracking stations for one packet: 14
These little balloons are great fun, cheap to make and easy to fly. I look forward to helping track the next one!.
[youtube=https://www.youtube.com/watch?v=YwIpa9HqzdU]