
by Peter VK3PH
This post is for people that are looking for an easy way to implement the pywws weather station software on a Raspberry Pi. The original software and associated documentation was sourced from Jim Easerbrook’s web site at https://github.com/jim-easterbrook/pywws. The documentation on Jim’s web site is fairly generic and requires a reasonable understanding of Linux systems. The software was built to meet his specific needs therefore it is far more complex than what we need to scan the weather station for uploading data to Weather Underground. The information that follows is designed for low cost USB WH1080 type weather stations. These are the ones that are readily available from Jaycar stores. The software will upload to Weather Underground and it can also be used for uploading to the Bureau of Meteorology (BOM) web site.
Introduction
pywws is a collection of python scripts to read, store, process and forward data from popular USB weather stations such as the WH1080. It should work with most models that come supplied with the EasyWeather software, but this is not guaranteed. The software has been designed to run on low power, low memory devices such as a Raspberry Pi and supports many more functions than the ones described here. The main purpose of this post is to help users get going quickly without the hassle of needing to resolve dependencies and fix the issues that this will cause. I have basically done that for you.
Getting a copy of pywws
If you have plenty of time to spare, go to Jim’s web site and follow his instructions. I did this a while ago and it took quite a while to get things working reliably. At the time, the pywws version was 13.08_r1049 and his software has moved on since then. My raspberry pi operating system was up to date and all dependencies at their latest versions. I recently went through the process of upgrading everything which inevitably caused me issues. The image of the software I am providing here is at least 6 months old however, I know it works!
To obtain a copy of the software, contact Peter (vk3ph @wia.org.au).
The image file has been zipped up for efficiency, so the first thing you need to do is unzip it into a folder on your computers hard drive. This image was built from a 4 Gb SD card, although it can be copied onto any SD card of 4 Gb or greater. I’m currently using a 16 Gb Class 10 SD card in my Raspberry Pi. I will explain latter, how to expand the file system to fill an SD card greater than 4 Gb.
Copy the image to an SD card
If you are going to do this from a Windows computer, the best program for the job is Win32 Disk Imager. This program can be downloaded from http://sourceforge.net/projects/win32diskimager/ and is very useful utility. Once installed, run the program and you should see a window pop up like the following:

Insert your blank SD card in the card reader of your computer and the device ID (i.e. [I:\]) should appear in the Device dropdown list of the above window. That will be the drive your OS has assigned to the SD card reader. Find the image file that you copied to the computer and drag the filename from an explorer window into the “Image File” box of the above window. An alternative is to navigate to the image file using the file open button – at the right of the Image File entry box.
To copy the image to the SD card, click on the Write button (Write data in ‘Image File’ to ‘Device’). You will be asked to confirm this operation as per the popup window shown below.
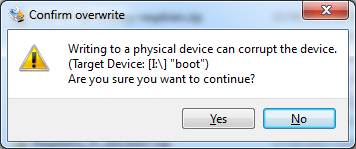
If you are sure that you have the right device selected, click on the Yes option and then wait for the process to complete. The time this takes will depend on the speed of your disk, CPU and the SD card. It could take up to several minutes.
Your SD card is now ready to be tested in your Raspberry Pi.
Insert the SD card into the Raspberry Pi, connect an Ethernet cable to your network and turn on the power. The Pi has been configured for DHCP, so it should get an IP address on your local network (you should be able to find the IP address of the Pi by looking at the DHCP table on your router). Start a terminal session on the Pi, either by double clicking on the “LXTerminal” icon on the desktop (lower left hand corner of the screen) or connecting to the Pi using a terminal program such as PuTTY.
Expand the file system to fill the SD card
This step is not required unless your SD card is bigger than 4 GB.
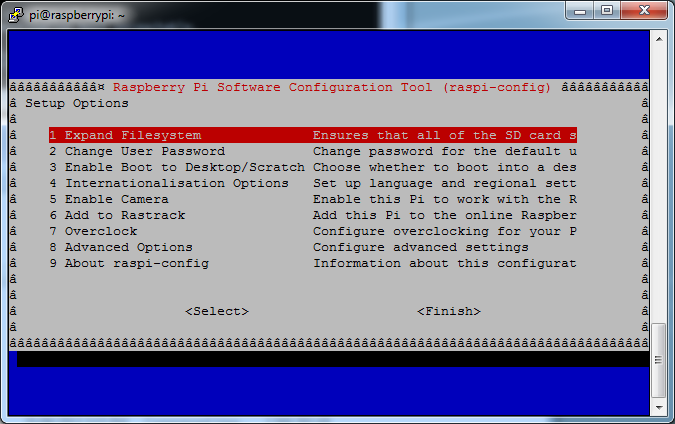
At the command prompt type: sudo raspi-config
Option 1 “Expand Filesystem” should be highlighted (see below). To select this option simply press the Enter key. The following message should be displayed: “Root partition has been resized. The filesystem will be enlarged upon next reboot”. Press Enter again to acknowledge “” and return to the menu.
Press the right arrow key twice to select and then press Enter to exit. You should get the message “Would you like to reboot now?”. Choose to reboot the Raspberry Pi.
You are now ready to configure the Pi to upload data to Weather Underground.
Configure the station ID and password
After the Pi has rebooted, start a terminal session on the Pi, either by double clicking on the “LXTerminal” icon on the desktop (lower left hand corner of the screen) or connecting to the Pi using a terminal program such PuTTY.
At the command prompt type: nano weather/data/weather.ini
Use the down arrow key to move the cursor to the bottom of the file, which should look something like this:

Under the [underground] tag:
- at station = unknown replace with (i.e. IVICTORI215)
- at password = unknown replace with (i.e. open-sesame)
Press X to exit, then Y to save changes.
Make sure you have the weather station connected to the Raspberry Pi and the Raspberry Pi is connected to your network. Reboot the Pi using the following command (or just cycle the power): sudo reboot
When the Raspberry Pi restarts, it will make a connection to the weather station and start uploading data to the internet (Weather Underground).
Hope this all makes sense (and works for you).
Links to Weather Underground
The following link to sites using the pywws software on the Raspberry Pi to upload data to Weather Underground.
http://www.wunderground.com/weatherstation/WXDailyHistory.asp?ID=IVICTORI145
http://www.wunderground.com/weatherstation/WXDailyHistory.asp?ID=IVICTORI215
http://www.wunderground.com/weatherstation/WXDailyHistory.asp?ID=IVICDONV3
Cheers,
Peter VK3PH